
Motivation
If you're like me, you try and keep all of your coding-based clutter on a virtual machine. Which usually works great. You can maintain a clean OS, separate work from pleasure, and quickly return to a snapshot if something goes terribly wrong. But when I tried doing development for Android from a virtual machine, I quickly arrived at an unexpected hurdle.
If you try and run Android Studio's emulators, you'll quickly be reminded that you can't simply run a virtual machine inside a virtual machine. You technically can, if you enable Nested VT-x/AMD-V, but even if you succeed navigating the hell of starting an AVD android emulator from inside your VM, you'd be met by the huge performance hit of running nested virtualisation.
You can instead consider running either the Genymotion emulator or Xamarin Android Player, which both use Oracle's VirtualBox to run their emulators. But instead of running them inside your VM (and being met with the issue of nested virtualisation), you can run these emulators on your host OS. Since both of these use VirtualBox, you can take full use of the networking aspect of VMs to connect your development VM to your Android emulator VM!
Hence, my solution is to have two separate virtual machines running in VirtualBox on the host OS, and let them communicate using networking.
Setup
I'm assuming you've already
- Downloaded and installed VirtualBox
- Set up a development VM inside of VirtualBox
- Connected your dev VM to the outside world using either NAT or Bridged networking (I personally use bridged, since it helps me to easier access any web dev instances running in the VM)
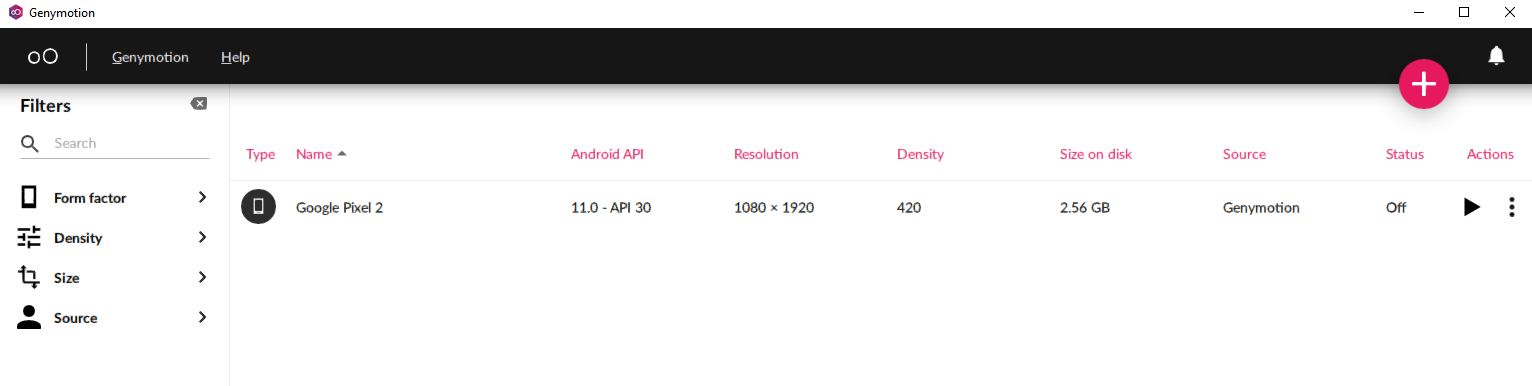
Creating a virtual device
Alrighty, now we can download and install either Genymotion emulator or Xamarin Android Player on your host OS.
After you've done that, you can start up your software, and set up a virtual device (phone) by following the instructions.
Now we need to do some configuration work inside VirtualBox.
Configuring the virtual mobile device
If you open up VirtualBox, you'll see that the newly created virtual mobile device is listed in the list of machines.
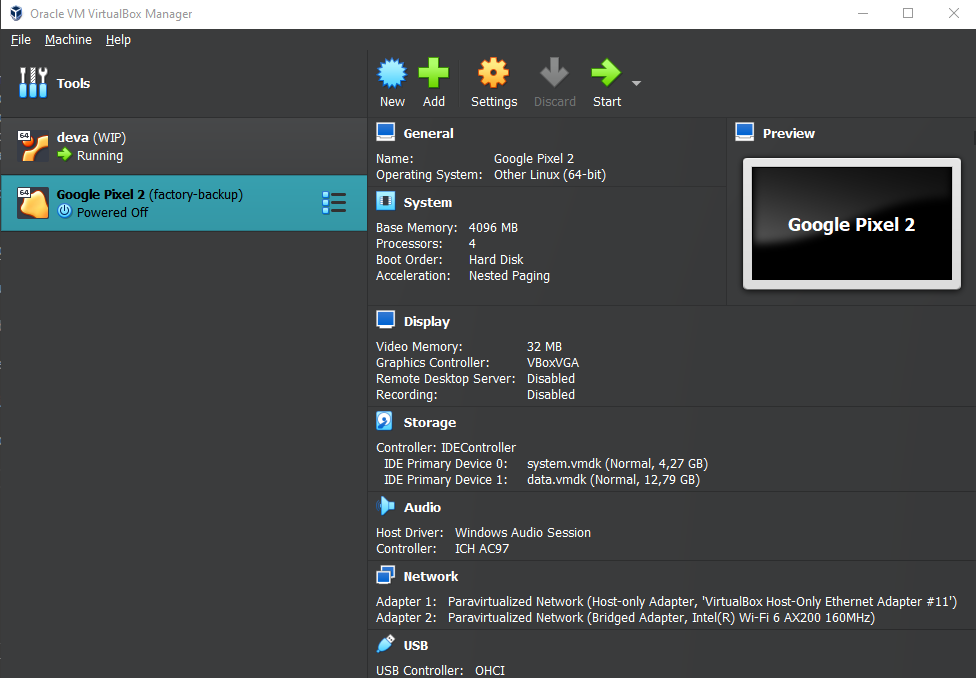
We need to edit the network settings for the mobile device. It will need two adapters. One is to connect to the network of the development machine (NAT or Bridged). In my case the machines are in a bridged network, which makes it easier to access from the host OS, as well as between each-other.
For some development platforms like React-Native, it's important that both the dev machine and mobile device are on the same network to allow easy debugging.

The other, arguably more important adapter to add/enable is the Host-only Adapter. This is the one adb will connect over.
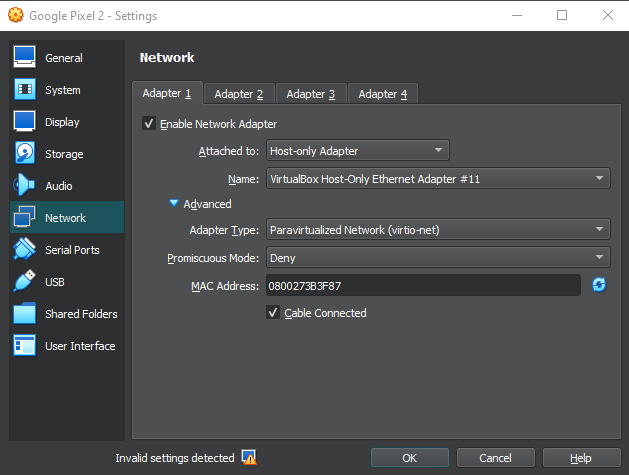
Make note of the adapter name here!
VirtualBox has the habit of creating multiple host-only adapters, so this name is very important to make note of.
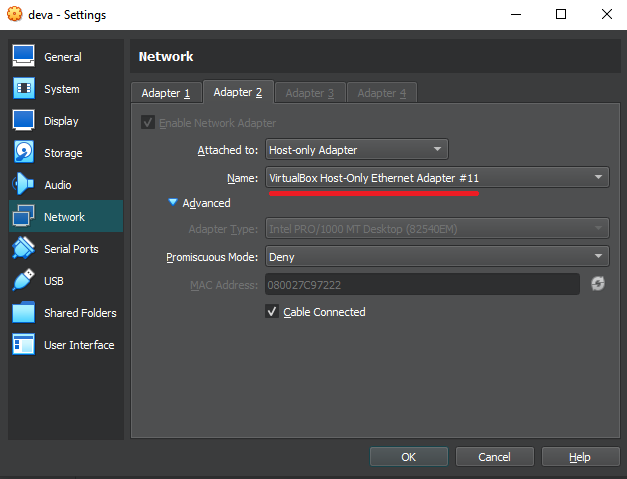
Configuring the development VM
Now that we have set the mobile device settings up, we need to mirror them in the develpment VM. If you've used NAT for the mobile device, redo the settings in the development one. If you've put it into a bridged network, do the same to the dev VM.
After this, we need to add a Host-only Adapter to the dev VM. Did you take note of the Adapter name from the mobile machine? This is where you use it!
Starting up the machines
Normally, you just start them from their respective applications. Start the mobile machine from Xamarin or Genymotion, and start your dev VM from VirtualBox.
But I've found that if I start the mobile machine from Genymotion, it tends to reset the Host-only Adapter name, add a new one, and fail to start. So, if this happens to you, this is what I do:
- Start the mobile machine from VirtualBox. A command-line terminal will pop up, and will start loading.
- When it appears that the terminal isn't doing anything anymore, you can safely start the mobile device from Genymotion.
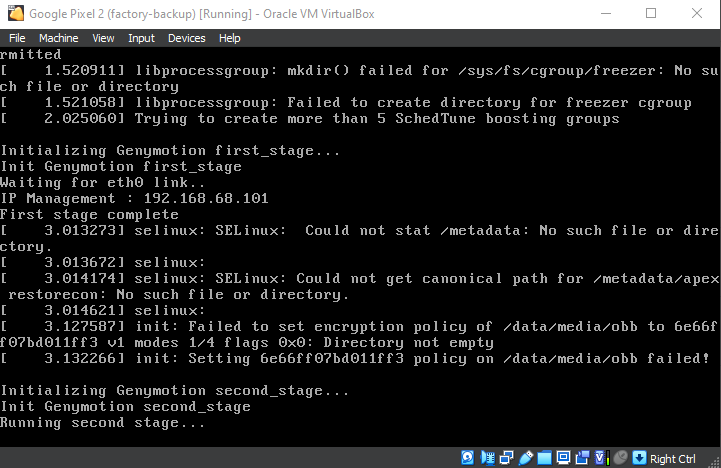
This is how my terminal looks when it stops loading. At this stage, I start the device from Genymotion as normal.
If you haven't already, you can now start your development VM as well.
Connecting to the mobile device
In this scenario, we are going to use adb to connect to the mobile device from the dev VM. All we need is the IP that the device is running on. Both Genymotion and Xamarin provide some way to see the IP.

But if you're having trouble to find it, you can go to VirtualBox, and see the IP from the terminal we saw earlier.
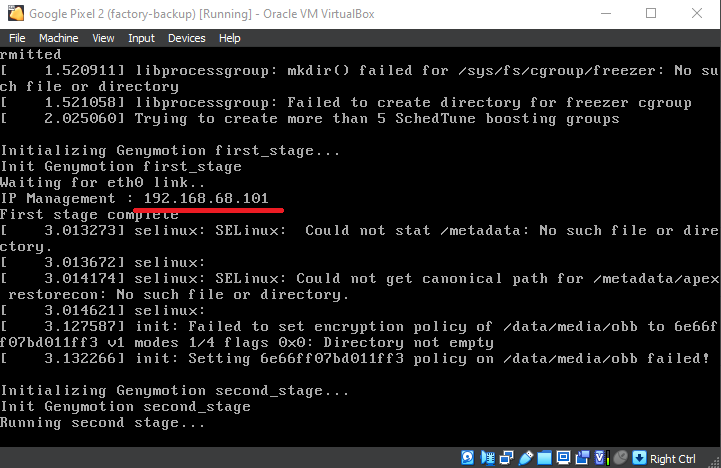
So, now we can easily connect from our dev VM using the command-line tool adb
kblagoev@deva:~/Android/Sdk/platform-tools$ ./adb connect 192.168.68.101
* daemon not running; starting now at tcp:5037
* daemon started successfully
connected to 192.168.68.101:5555
kblagoev@deva:~/Android/Sdk/platform-tools$
Success!
And since I've used a bridged network, I can also easily do network connections between the two devices, which can be quite useful in some cases. So I recommend it, unless you have your own way of doing it.
Now you can develop! Have fun!
Thank you for reading!
The information in this blog, as well as all the tools, apps and libraries I develop are currently open source.
I would love to keep it this way, and you can help!
You can buy me a coffee from here, which will go towards the next all-nighter I pull off!

Or you can support me and my code monthly over at Github Sponsors!
Thanks!